Showing posts with label Yeast. Show all posts

Friday, March 26, 2010

Growing Up Isn't Hard To Do

When it comes to yeast ranching, I'm usually a mason-jar kind of guy. I scoop up a big helping of slurry and store it in the back of the fridge until I'm ready to reuse that strain – normally not waiting too long so that the yeast stays healthy, fresh and viable.

That's one method for saving yeast at home. Another one is using slants. These are relatively small volumes of yeast grown and kept inside test tubes filled partly with malt agar. (The name derives from the technique of allowing the agar to firm up while the tube rests on an angle, thus maximizing the surface area available for the yeast colony to grow on.)

There are advantages to using slants, including the ability to store the yeast for a very long time (some say indefinitely) and the ability to keep a clean, pure strain on hand to grow from as desired.

I was eager to try my hand at growing yeast from a slant – not creating my own, mind you; that may come down the road – and I was also eager to get my hands on Wyeast 1028, a strain I'd not yet worked with. Enter a friend in my homebrew club, a dedicated slant-keeper and yeast horder, who offered to give me a fresh slant of Wyeast 1028 from his stash after I'd mentioned my interest in it.

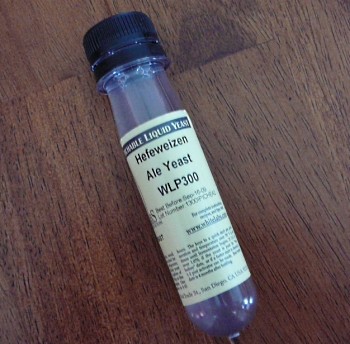
When it was time to start growing up a starter of the yeast, I took my slant out of the fridge, made 20 mL of a 1.040 wort with DME, fashioned a loop from a paper clip, sterilized it with a flame, and simply scraped some yeast off the slant and inoculated the wort (a volume so small I was able to start it off in a used White Labs yeast vial).

Following my friend's instructions, I stepped the volume up to 200 mL about 24 hours later, and then up to around 1.2 L another day after that. And with that I had a starter ample enough for the British Bitter I'll be brewing tomorrow.

The exercise has been moderately labor-demanding – there are worse things than doing a small homebrew task every night for a few nights, but plan accordingly – but not anywhere near as intimidating or unreasonable as one might think when first considering entering into the world of slants. Things have gone so well, in fact, that I might even consider setting up a yeast ranch of my own, monopolizing every vegetable and cheese drawer in the process but ensuring an ever-growing and ever-ready stable of strains to suit whatever my brewing fancy demands.

Thursday, December 17, 2009

Top-Crop Till You Drop

Nowadays, the price of yeast (particularly liquid yeast) can make up a fairly sizable chunk of the cost of a batch of homebrew. At up to $9 a vial or pouch (depending on where you shop), this can be a substantial portion of a batch's cost, especially for brewers who buy hops and grain in bulk. Good thing is, there's a simple method for dealing with this. Reusing yeast isn't just a way for frugal homebrewers to save a buck (something we tend to be fans of) but it's also great for building up large, healthy quantities of yeast to ensure great fermentations down the line.

Probably the most popular method of harvesting yeast is to do so after fermentation, when the beer is racked out of primary leaving all that yeast behind. This is effective for gathering up a big quantity of yeast (and depending on your brewing schedule, pitching new wort directly onto a yeast cake can work), but the technique is not without its disadvantages.

Perhaps the main fallback is this: the muck left behind after racking is not purely yeast. There will also be trub from the kettle, consisting mainly of proteins and hop material (subject to that batch's hopping rate and whether pellets, bags, etc. were employed). Harvesting yeast slurry after primary means picking up some non-yeast material, in all likelihood.

Some brewers, as an alternative, choose to collect yeast via top-cropping, whereby the yeast is skimmed off the surface of the wort during the height of active fermentation. This ensures that the goods you are getting are clean, active, healthy and lively yeast cells.

And it's easy to do. I start with a small canning jar that gets a quick soak in some sanitizer. Then I add a small amount (a couple ounces only) of filtered water to the jar, which then goes into the microwave to just to make sure nothing's alive in there. I set the lid on top while things cool off; the steam helps to ensure everything's sanitary even though, yes, I'd already given the jars a sanitizer bath. Extra precautions can't hurt when you're dealing with something as important as your yeast.

The ideal time to top-crop is shortly after active fermentation has kicked into high gear. Give the yeast enough time to move any hop material to the side of the fermenter, but don't wait so long that the yeast mat has fallen too much back into the beer, or you might not find yourself with enough skimmable yeast to fill your jar. A visit to Jamil Zainasheff's yeast pitching rate tool will give you an idea of how much slurry you'll want for your next batch.

I scoop the yeast off with a sanitized spoon and stir it into the water in the jar, which helps knock the yeast off the spoon and will also form a thin, protective layer on top once things settle out in the fridge. With a label affixed identifying the yeast strain, its generation number and date of collection, this little jar of wonder is ready to live in the back of my fridge until it's time to unleash its magic on another bucket of sugar water.

Yeast slurry can be saved in the fridge for several months. Inside a couple weeks, you can usually simply repitch the slurry right into the next batch; longer and a small starter might be helpful to wake things up. Jamil's calculator will help to figure out the yeast viability based on its age and give an idea of how much extra slurry should be pitched accordingly.

Congratulations! You just got to play with nature's coolest fungus*, improved the quality of your future batches and saved some cash at the same time. Now go blow that money on beer.

* Up for debate
Related Posts with Thumbnails